Are you looking for the ultimate comfort food that is as nutritious as it is delicious? If so, you have come to the right place. There is something truly magical about the vibrant green hue and the silky texture of a perfectly made Palak Paneer recipe. Whether you are a seasoned fan of Indian cuisine or a curious beginner, learning how to make Palak Paneer in your own kitchen is a rewarding experience that will change your weeknight dinner game forever.
In this guide, I am going to share my secrets for the best Palak Paneer recipe you have ever tasted—one that rivals your favorite Indian restaurant but uses wholesome, everyday ingredients. We will cover everything from blanching techniques to the perfect spice balance. Furthermore, you will learn how to keep that spinach looking bright and fresh rather than dull and brown. By the end of this post, you will be a pro at creating this homemade Palak Paneer classic!
What is Palak Paneer?
Palak Paneer is arguably one of the most beloved vegetarian dishes across the globe. Originating from the Punjab region of Northern India, “Palak” translates to spinach, and “Paneer” refers to the firm Indian cottage cheese. Unlike other heavy Indian curries, an authentic Palak Paneer focuses on the freshness of the greens, gently tempered with aromatic spices like cumin, ginger, and garlic.
The dish is celebrated not just for its incredible taste but also for its health benefits. Spinach is a powerhouse of iron, vitamins $A$ and $C$, and minerals, while paneer provides a significant protein boost. It is a staple in Indian households and a star of restaurant menus for a reason: it is the perfect marriage of earthy vegetables and creamy dairy. Using this Palak Paneer recipe, you can bring that heritage into your home.
Why You’ll Love This Recipe
- Quick and Efficient: You can have this meal on the table in under $40$ minutes, making it an excellent easy Palak Paneer option for busy evenings.
- Nutrient Dense: Packed with fresh spinach and protein-rich paneer, it is a guilt-free indulgence.
- Better Than Takeout: By making it yourself, you control the quality of the oil, the salt levels, and the freshness of the spices.
- Freezer Friendly: This gravy freezes beautifully, allowing you to meal-prep for future cravings.
- Authentic Flavor: We use traditional techniques like tempering and blanching to ensure an authentic Palak Paneer experience.
Ingredients for Homemade Palak Paneer
To create this masterpiece, you will need a few fresh staples and some dry spices. Here is exactly what to gather:
For the Spinach Puree
| Ingredient | Quantity | Note |
|---|---|---|
| Fresh Spinach (Palak) | $500$g | Cleaned and stems removed |
| Green Chilies | $2-3$ | Adjust based on heat preference |
| Ginger | $1$ inch | Peeled and roughly chopped |
| Sugar | $1/4$ tsp | Helps maintain the green color |
For the Gravy & Aromatics
| Ingredient | Quantity | Note |
|---|---|---|
| Paneer | $250$g | Cubed (store-bought or homemade) |
| Ghee or Oil | $2$ tbsp | Ghee provides the best flavor |
| Cumin Seeds | $1$ tsp | For tempering |
| Onions | $1$ large | Finely chopped |
| Garlic | $5-6$ cloves | Minced or crushed |
| Tomatoes | $2$ medium | Finely chopped or pureed |
| Turmeric Powder | $1/4$ tsp | Don’t use too much! |
| Garam Masala | $1/2$ tsp | For the final aromatic touch |
| Kasuri Methi | $1$ tsp | Dried fenugreek leaves (crucial) |
| Heavy Cream | $2$ tbsp | For that restaurant-style silkiness |
| Salt | To taste |
Step-by-Step Instructions
Follow these clear, beginner-friendly steps to ensure your homemade Palak Paneer turns out perfectly every time.
Step 1: Blanch the Spinach
Bring a large pot of water to a rolling boil. Add the sugar and the cleaned spinach leaves. Let them boil for exactly $2$ minutes. Immediately drain the leaves and plunge them into a bowl of ice-cold water. This “shocks” the spinach, stopping the cooking process and locking in that vibrant green color.
Step 2: Create the Smooth Puree
Once the spinach is cool, transfer it to a blender along with the green chilies and ginger. Blend until you achieve a silky-smooth consistency. Do not add extra water unless absolutely necessary, as we want a thick, luscious base.
Step 3: Sauté the Aromatics
In a heavy-bottomed pan or kadai, heat the ghee or oil over medium heat. Add the cumin seeds and let them sizzle. Next, add the finely chopped onions and sauté until they turn a light golden brown. However, be careful not to burn them, as bitter onions will ruin the delicate spinach flavor.
Step 4: Add Ginger and Garlic
Stir in the minced garlic. Sauté for about $1$ minute until the raw smell disappears. The aroma at this stage should be heavenly!
Step 5: Cook the Tomatoes and Spices
Add the chopped tomatoes and a pinch of salt. Cook until the tomatoes soften and the oil/ghee starts to separate from the sides of the mixture. This is a visual cue that the base is perfectly cooked. Add the turmeric powder and stir briefly.
Step 6: Combine the Spinach and Simmer
Pour the blended spinach puree into the pan. Stir well to combine with the onion-tomato masala. If the gravy is too thick, add a splash of warm water. Cover and simmer on low heat for $5-7$ minutes. Be careful of splattering!
Step 7: Prepare the Paneer
While the spinach simmers, you can optionally pan-fry your paneer cubes in a separate skillet with a tiny bit of ghee until they are golden brown. Alternatively, add them raw directly into the gravy for a softer texture.
Step 8: The Finishing Touches
Add the paneer cubes to the spinach gravy. Sprinkle with garam masala and crushed Kasuri Methi. Stir in the heavy cream. Let it cook for another $2$ minutes so the paneer absorbs the flavors. Remove from heat and serve hot.
Pro Tips & Tricks for the Best Palak Paneer
- Don’t Overcook the Spinach: Over-boiling or over-simmering the spinach puree will turn it from a bright green to a dark, muddy olive. Stick to the timing mentioned in the steps.
- Ice Bath is Essential: The cold water plunge is the number one secret to professional-looking easy Palak Paneer.
- Kasuri Methi is Key: Do not skip the dried fenugreek leaves. Rub them between your palms before adding to release the essential oils.
- Balance the Spices: Palak Paneer is a “mild” curry. Avoid using too much red chili powder or turmeric, as they can overpower the natural earthiness of the spinach.
- Cream Substitution: If you want a lighter version, you can substitute heavy cream with full-fat Greek yogurt (whisked) or cashew cream.
Recipe Variations
- Vegan Palak Paneer: Simply swap the paneer for extra-firm tofu and use coconut milk or cashew cream instead of heavy cream and ghee.
- Aloo Palak: If you don’t have paneer, use boiled, cubed potatoes. It’s a classic variation that is equally delicious.
- Instant Pot Version: You can sauté everything in the Instant Pot and pressure cook the spinach for $0$ minutes, followed by a quick release to maintain the color.
- Corn Palak: Adding sweet corn kernels provides a lovely texture and sweetness that contrasts perfectly with the savory spinach.
What to Serve With Palak Paneer
This versatile dish pairs beautifully with a variety of Indian breads and grains. Here are my favorite suggestions:
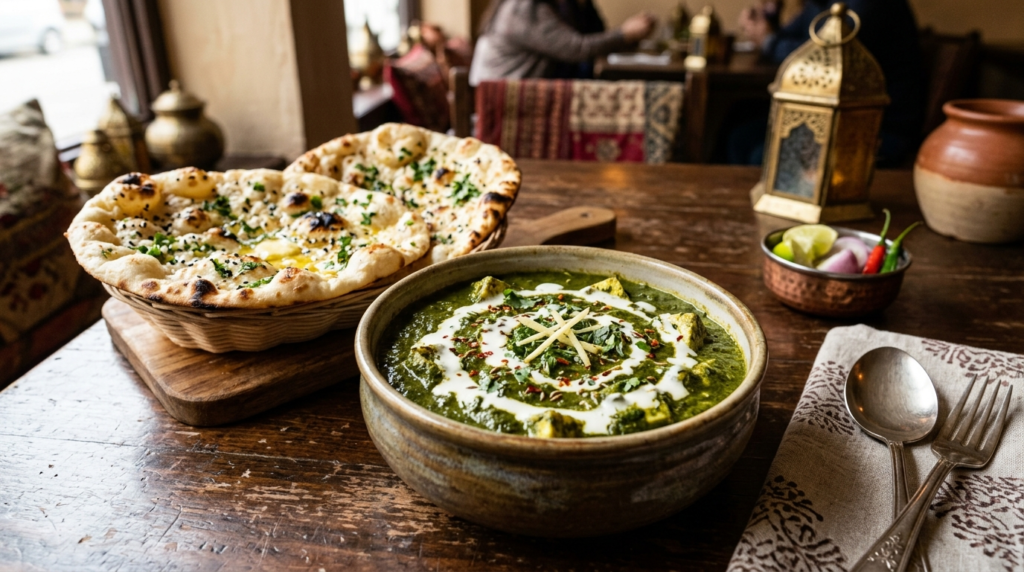
- Garlic Naan: The buttery, garlicky bread is perfect for scooping up the creamy gravy.
- Jeera Rice: Fragrant cumin rice provides a light, fluffy base for the dish.
- Cucumber Raita: A cooling yogurt side helps balance the warmth of the spices.
- Laccha Paratha: The flaky layers of this flatbread add a wonderful crunch to the meal.
- Fresh Onions and Lemon: Always serve with a few wedges of lemon and sliced red onions for a zesty crunch.
Storage & Reheating Instructions
In the Fridge: Store leftovers in an airtight container for up to $3$ days. The flavors often deepen the next day!
In the Freezer: You can freeze the spinach gravy (without the paneer and cream) for up to $2$ months. When ready to eat, thaw, reheat, and then add fresh paneer and cream.
Reheating: Reheat on the stovetop over low heat. If the gravy has thickened too much, add a tablespoon of water or milk to loosen it up. Avoid using a microwave for long periods as it can make the paneer rubbery.
Frequently Asked Questions (FAQ)
Q: How do I keep my Palak Paneer bright green? A: The secret is blanching the spinach for only $2$ minutes and immediately placing it in an ice-water bath. Additionally, adding a pinch of sugar to the boiling water helps preserve the chlorophyll.
Q: Can I use frozen spinach for this Palak Paneer recipe? A: Yes, you can! Thaw the frozen spinach completely and squeeze out the excess water before pureeing it with ginger and chilies. The flavor remains excellent, though fresh spinach is always preferred.
Q: Is Palak Paneer the same as Saag Paneer? A: Not exactly. While Palak Paneer uses only spinach, “Saag” refers to a mixture of various greens, such as mustard greens, collard greens, or fenugreek leaves. Palak Paneer is a specific type of Saag Paneer.
Q: How do I make the paneer soft? A: If using store-bought paneer, soak the cubes in warm water for $15$ minutes before adding them to the gravy. This rehydrates the cheese and ensures a melt-in-your-mouth texture.
Q: Is this Palak Paneer recipe gluten-free? A: Yes, this recipe is naturally gluten-free! Just ensure that your spices (like hing, if you use it) are certified gluten-free, as some brands mix wheat flour into their spice blends.
Conclusion
Mastering this Palak Paneer recipe is a milestone for any home cook. It is a dish that brings warmth, health, and a touch of elegance to your dining table. Whether you are making it for a special occasion or a simple family dinner, this authentic Palak Paneer is sure to impress everyone who tries it.
I hope you enjoy making (and eating!) this recipe as much as I do. If you try it, please leave a rating and a comment below to let me know how it turned out. Your feedback helps me create better content for you! Happy cooking!